This article assumes you have set up the Tizen/Visual Studio development environment as outlined in this previous article.
Installing the Watch Emulator
The first step is to install the relevant emulator so you don’t need a physical Samsung Galaxy Watch. To do this open Visual Studio and click Tools –> Tizen –> Tizen Emulator Manager
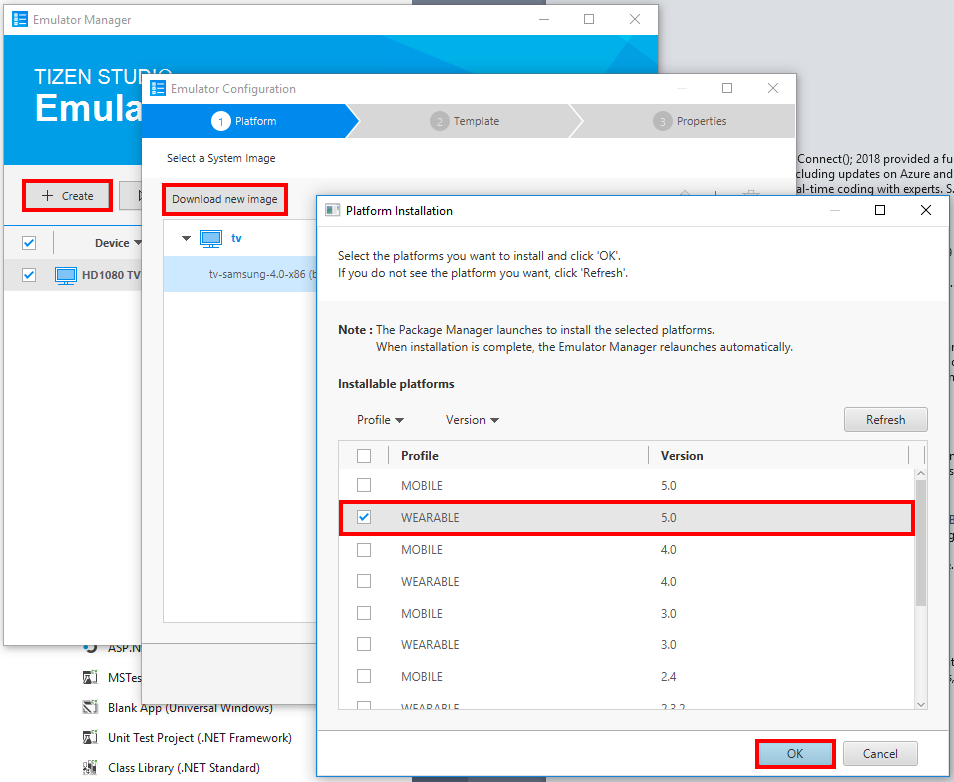
This will bring up the Emulator Manager, click the Create button, then Download new image, check the WEARABLE profile, and click OK. This will open the Package Manager and download the emulator.
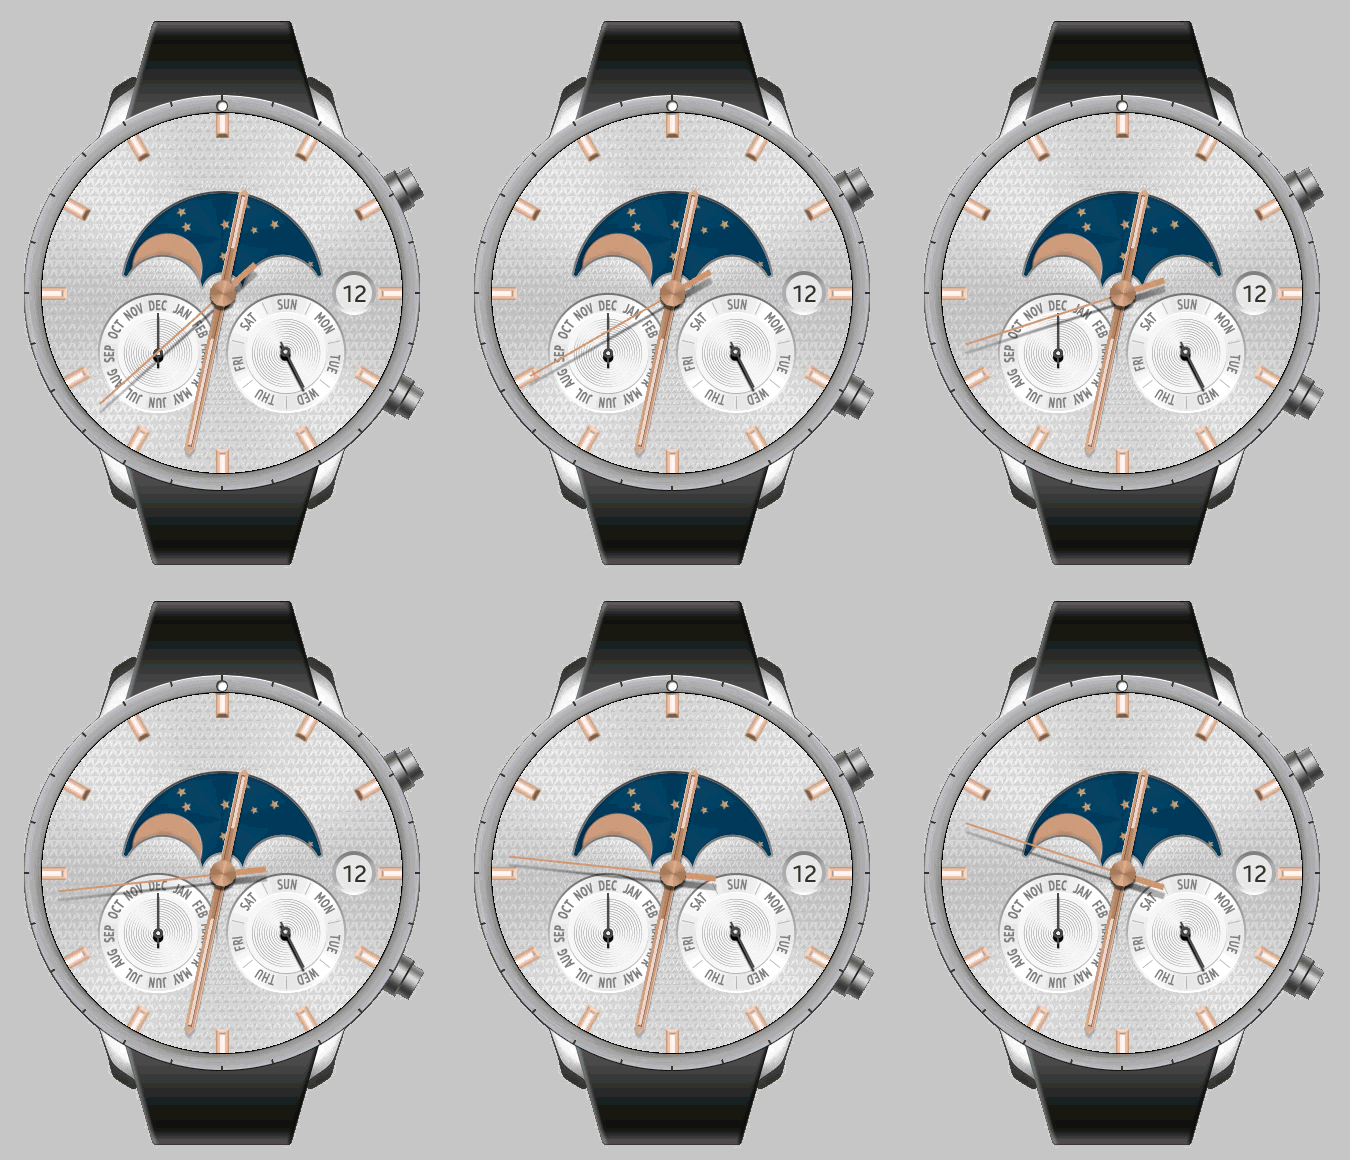
Once the installation is complete, if you open the Emulator Manager, select Wearable-circle and click Launch you should see the watch emulator load as shown in the following screenshot:
Creating a Watch Project
In Visual Studio, create a new Tizen Wearable Xaml App project which comes under the Tizen 5.0 section.
Once the project is created and the with the emulator running, click the play button in Visual Studio (this will be something like “W-5.0-circle-x86…” ).
The app will build and be deployed to the emulator – you may have to manually switch back to the emulator if it isn’t brought to the foreground automatically. You should now see the emulator with the text “Welcome to Xamarin.Forms!”.
This text comes from the MainPage.xaml:
<?xml version="1.0" encoding="utf-8" ?>
<c:CirclePage xmlns="http://xamarin.com/schemas/2014/forms"
             xmlns:x="http://schemas.microsoft.com/winfx/2009/xaml"
             xmlns:c="clr-namespace:Tizen.Wearable.CircularUI.Forms;assembly=Tizen.Wearable.CircularUI.Forms"
             x:Class="TizenWearableXamlApp1.MainPage">
  <c:CirclePage.Content>
    <StackLayout>
      <Label Text="Welcome to Xamarin.Forms!"
          VerticalOptions="CenterAndExpand"
          HorizontalOptions="CenterAndExpand" />
    </StackLayout>
  </c:CirclePage.Content>
</c:CirclePage>
Modifying the Basic Template
As a very simple (and quick and dirty, no databinding, MVVM, etc.) example, the MainPage.xaml can be changed to:
<?xml version="1.0" encoding="utf-8" ?>
<c:CirclePage xmlns="http://xamarin.com/schemas/2014/forms"
             xmlns:x="http://schemas.microsoft.com/winfx/2009/xaml"
             xmlns:c="clr-namespace:Tizen.Wearable.CircularUI.Forms;assembly=Tizen.Wearable.CircularUI.Forms"
             x:Class="TizenWearableXamlApp1.MainPage">
    <c:CirclePage.Content>
        <StackLayout HorizontalOptions="CenterAndExpand" VerticalOptions="CenterAndExpand">
            <Label x:Name="HappyValue" Text="5" HorizontalTextAlignment="Center"></Label>
            <Slider x:Name="HappySlider" Maximum="10" Minimum="1" Value="5" ValueChanged="HappySlider_ValueChanged" ></Slider>
            <Button Text="Go" Clicked="Button_Clicked"></Button>
    </StackLayout>
  </c:CirclePage.Content>
</c:CirclePage>
And the code behind MainPage.xaml.cs:
using System;
using System.Collections.Generic;
using System.Linq;
using System.Text;
using System.Threading.Tasks;

using Xamarin.Forms;
using Xamarin.Forms.Xaml;
using Tizen.Wearable.CircularUI.Forms;
using System.Net.Http;

namespace TizenWearableXamlApp1
{
    [XamlCompilation(XamlCompilationOptions.Compile)]
    public partial class MainPage : CirclePage
    {
        private int _happyValue = 5;

        public MainPage()
        {
            InitializeComponent();
        }

        private async void Button_Clicked(object sender, EventArgs e)
        {
            HttpClient client = new HttpClient();

            var content = new StringContent($"{{ \"HappyLevel\" : {_happyValue} }}", Encoding.UTF8, "application/json");

            var url = "https://prod-29.australiasoutheast.logic.azure.com:443/workflows/[REST OF URL REDACTED FOR PRIVACY/SECURITY]";

            var result = await client.PostAsync(url, content);

        }

        private void HappySlider_ValueChanged(object sender, ValueChangedEventArgs e)
        {
            _happyValue = (int)Math.Round(HappySlider.Value);

            HappyValue.Text = _happyValue.ToString();
        }
    }
}
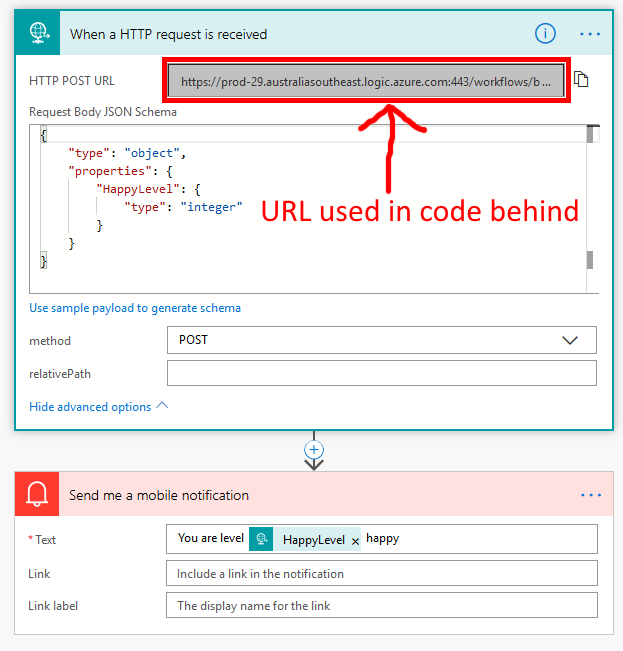
The preceding code essentially allows the user to specify how happy they are using a slider, and then hit the Go button. This button makes an HTTP POST to a URL, in this example the URL is a Microsoft Flow HTTP request trigger.
The flow is shown in the following screenshot, it essentially takes the JSON data in the HTTP POST, uses the HappyLevel JSON value and sends a mobile notification to the Flow app on my iPhone.
Testing the App
To test the app, run it in Visual Studio:
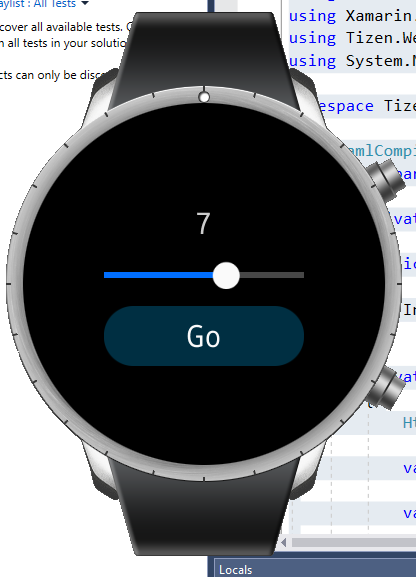
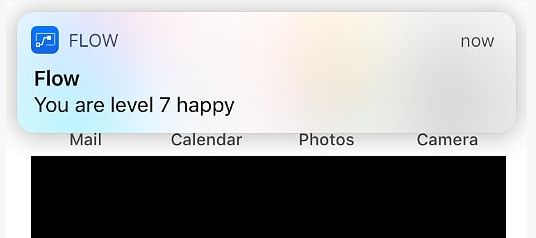
Tapping the Go button will make the HTTP request and initiate the Microsoft Flow, and after a few moments, the notification being sent to the phone:
If you want to fill in the gaps in your C# knowledge be sure to check out my C# Tips and Traps training course from Pluralsight – get started with a free trial.


SHARE: