As the Azure Functions story continues to unfold, the latest facility is the ease of creation of precompiled functions. Visual Studio 2017 Update 3 (v15.3) brings the release of functionality to create function code in C# using all the familiar tools and abilities of Visual Studio development (you can also use the Azure Functions CLI).
Precompiled functions allow familiar techniques to be used such as separating shared business logic/entities into separate class libraries and creating unit tests. They also offer some cold start performance benefits.
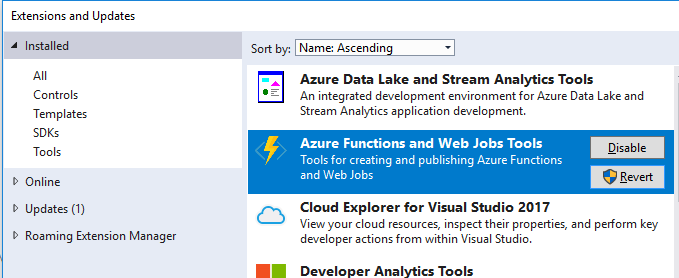
To create your first precompiled Azure Function, first off install Visual Studio 2017 Update 3 (and enable the "Azure development tools" workload during installation) and once installed also ensure the Azure Functions and Web Jobs Tools Visual Studio extension is installed/updated.
After you’ve created an Azure account (free trials may be available), open Visual Studio and create a new Azure Functions project (under the Cloud section):
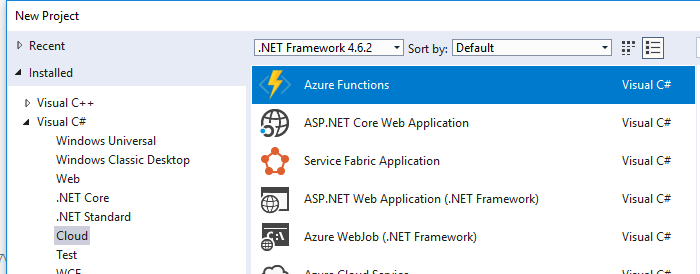
This will create a new project with a .gitignore, a host.json, and a local.settings.json file.
To add a new function, right click the project, choose add –> new item. Then select Azure Function:

The name of the .cs file can be anything, the actual name of the function in Azure is not tied to the class file name.
Next the type of function (trigger) can be selected, such as a function triggered by an HTTP request:
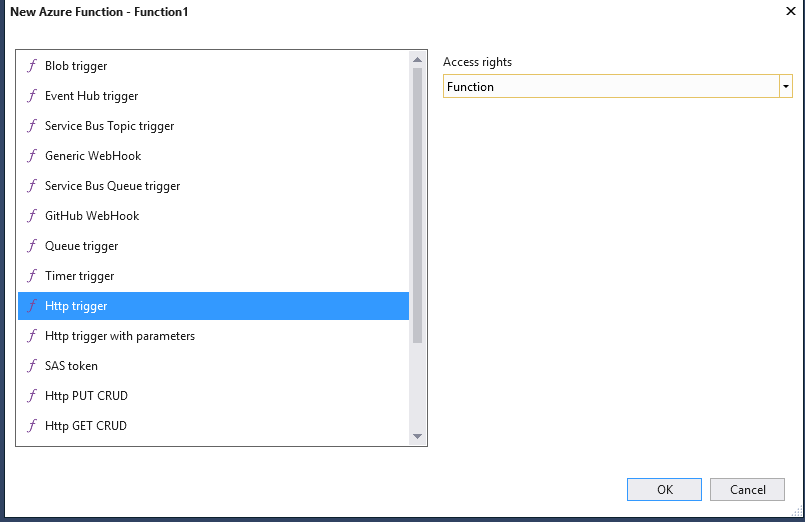
Adding this will create the following code (note the name of the function has been changed in the [FunctionName] attribute):
namespace MirrorMirrorOnTheWall
{
    public static class Function1
    {
        [FunctionName("WhosTheFairestOfThemAll")]
        public static async Task<HttpResponseMessage> Run(
            [HttpTrigger(AuthorizationLevel.Function, "get", "post", Route = null)]HttpRequestMessage req,
            TraceWriter log)
        {
            log.Info("C# HTTP trigger function processed a request.");

            // parse query parameter
            string name = req.GetQueryNameValuePairs()
                .FirstOrDefault(q => string.Compare(q.Key, "name", true) == 0)
                .Value;

            // Get request body
            dynamic data = await req.Content.ReadAsAsync<object>();

            // Set name to query string or body data
            name = name ?? data?.name;

            return name == null
                ? req.CreateResponse(HttpStatusCode.BadRequest, "Please pass a name on the query string or in the request body")
                : req.CreateResponse(HttpStatusCode.OK, "Hello " + name);
        }
    }
}
We can simplify this code to:
namespace MirrorMirrorOnTheWall
{
    public static class Function1
    {
        [FunctionName("WhosTheFairestOfThemAll")]
        public static HttpResponseMessage Run(
            [HttpTrigger(AuthorizationLevel.Function, "get", "post", Route = null)]HttpRequestMessage req,
            TraceWriter log)
        {
            log.Info("C# HTTP trigger function processed a request.");

            return req.CreateResponse(HttpStatusCode.OK, "You are.");
        }
    }
}
Hitting F5 in Visual Studio will launch the local Azure Functions environment and host the newly created function:
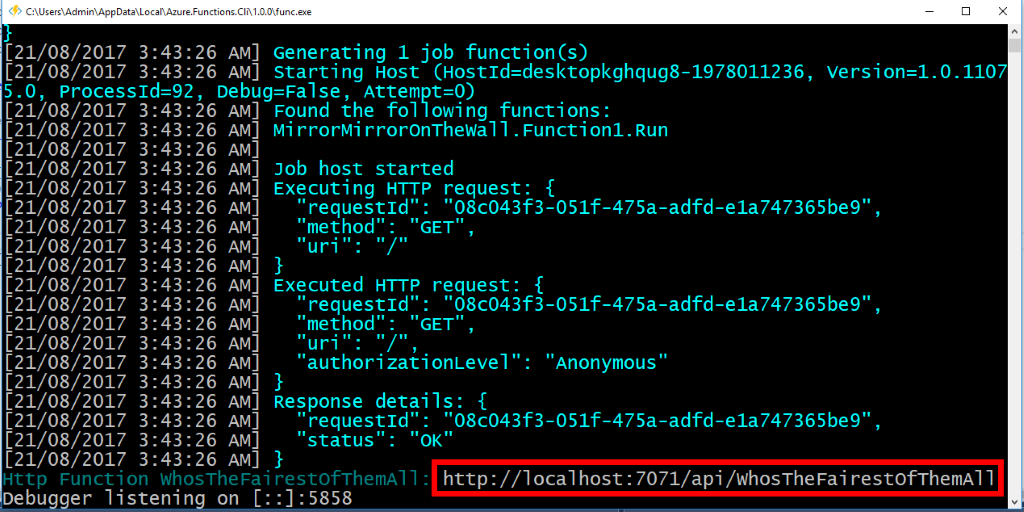
Note in the preceding screenshot, the “WhosTheFairestOfThemAll” function is loaded and is listening on “http://localhost:7071/api/WhosTheFairestOfThemAll”. If we hit that URL, we get back “You are.”.
Publishing to Azure
Right click the project in Visual Studio and choose publish, this will start the publish wizard:
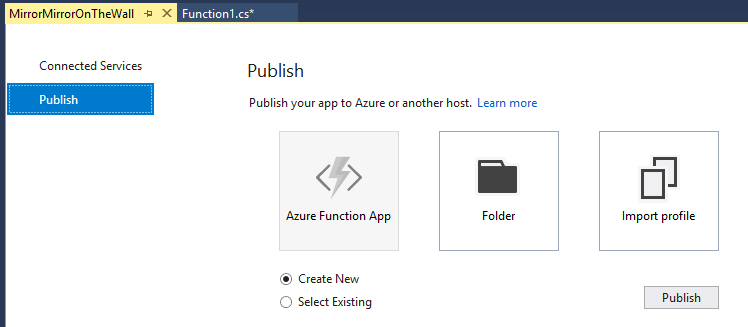
Choose to create a new Function App and follow the prompts, you need to select your Azure Account at the top right and choose an App Name (in this case “mirrormirroronthewall”). You also need to choose existing items or create new ones for Resource Groups, etc.
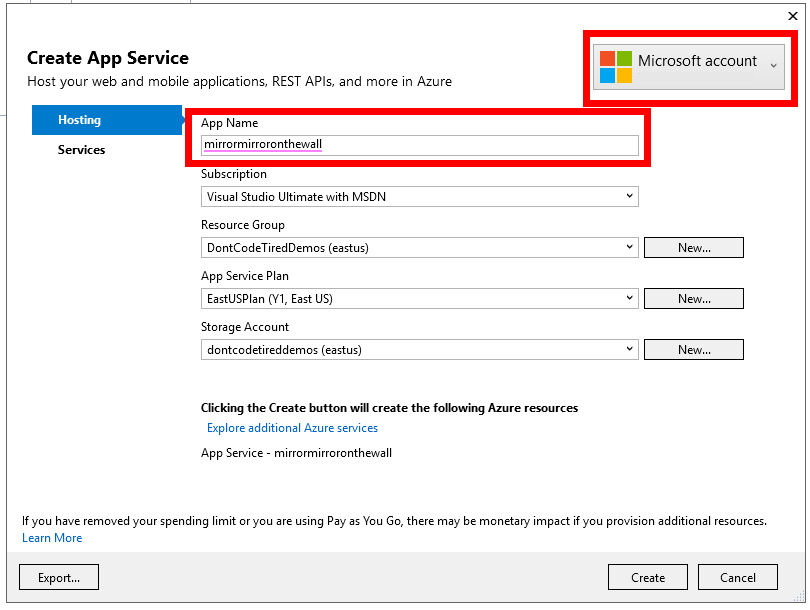
Click create and the deployment will start.
Once deployed, the function is now listening in the cloud at “https://mirrormirroronthewall.azurewebsites.net/api/WhosTheFairestOfThemAll”.
Because earlier we specified an Access Rights setting of Function, a key needs to be provided to be able to invoke the function. This key can be found in the Azure portal for the newly created function app:
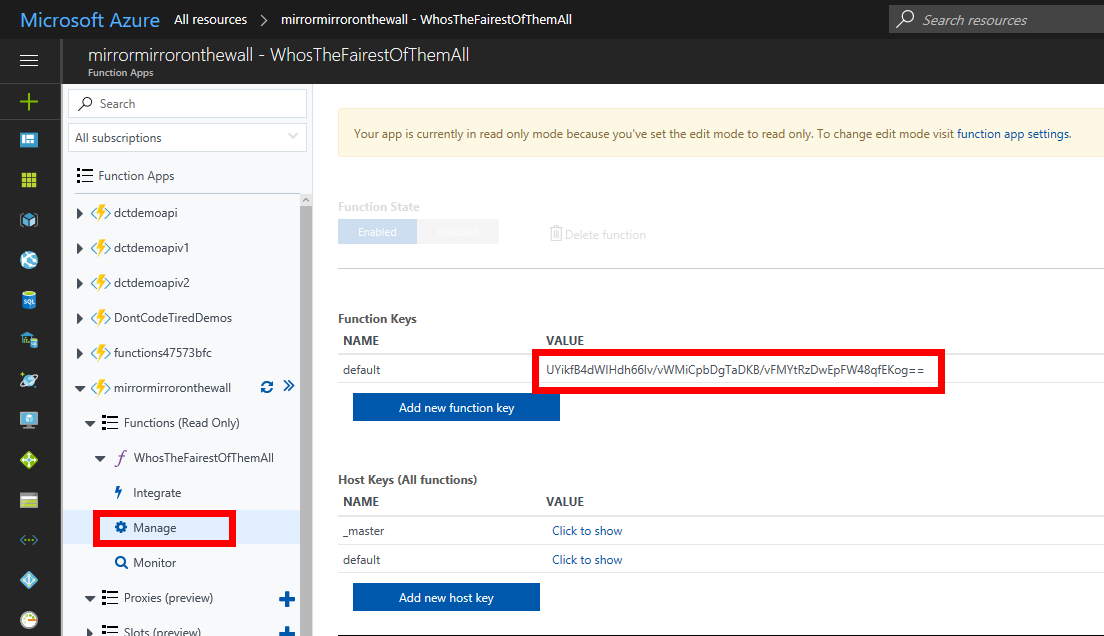
Now we can add the key as a querystring parameter to get: “https://mirrormirroronthewall.azurewebsites.net/api/WhosTheFairestOfThemAll?code=UYikfB4dWIHdh66Iv/vWMiCpbDgTaDKB/vFMYtRzDwEpFW48qfEKog==”. Hitting up this URL now returns the result “You are.” as it did in the local environment.
To learn how to create precompiled Azure Functions in Visual Studio, check out my Writing and Testing Precompiled Azure Functions in Visual Studio 2017 Pluralsight course.
You can start watching with a Pluralsight free trial.


SHARE: