This is the sixth part in a series demonstrating how to setup continuous deployment of an Azure Functions App using Azure DevOps build and release pipelines.
Demo app source code is available on GitHub.
In the previous instalment we saw how unit tests are executed as part of the build pipeline and that if tests fail then the build fails. If the tests (and the rest of the build) succeed, a release pipeline can be triggered to deploy the Function App automatically to Azure.
Creating an Initial Function App Release Pipeline
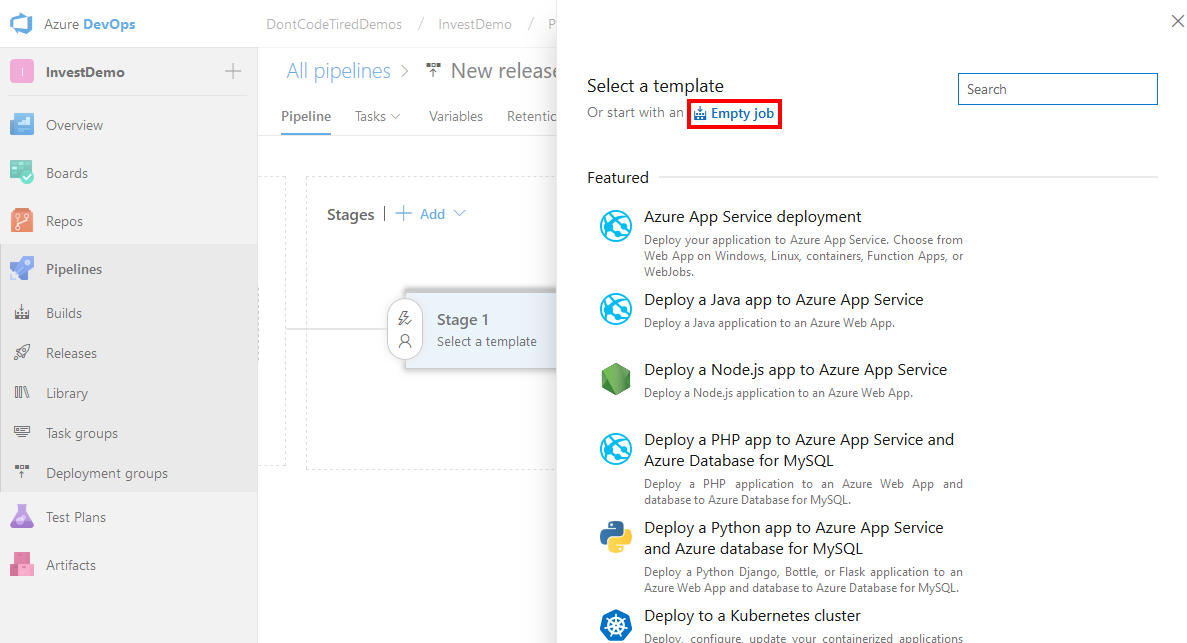
In your Azure DevOps project, click Pipelines and Releases.If you have no pipelines currently defined you will see a “No release pipelines found” message and a New Pipeline button.Clicking this button will start the release creation wizard, the first step of which is to choose a starter template (or start with an empty job).You should explorer these templates to get an idea for what’s possible. For the purposes of this series, click the Empty job link:
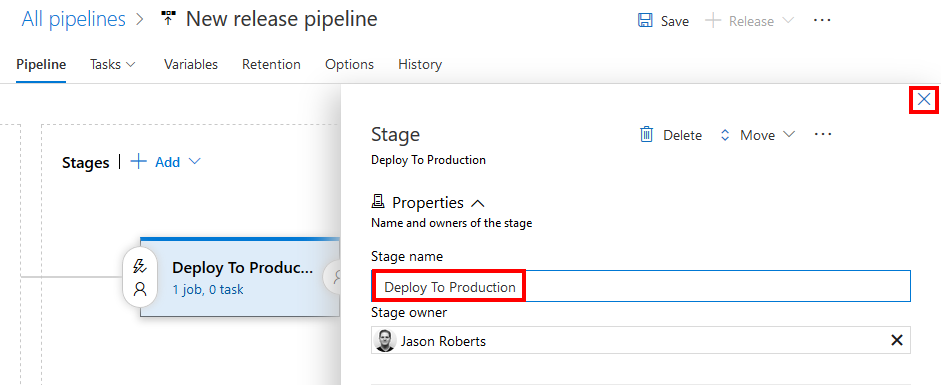
This will automatically create a stage in the new release pipeline, rename this stage to “Deploy To Production” and click the close button:
Adding Build Artifacts to a Release Pipeline
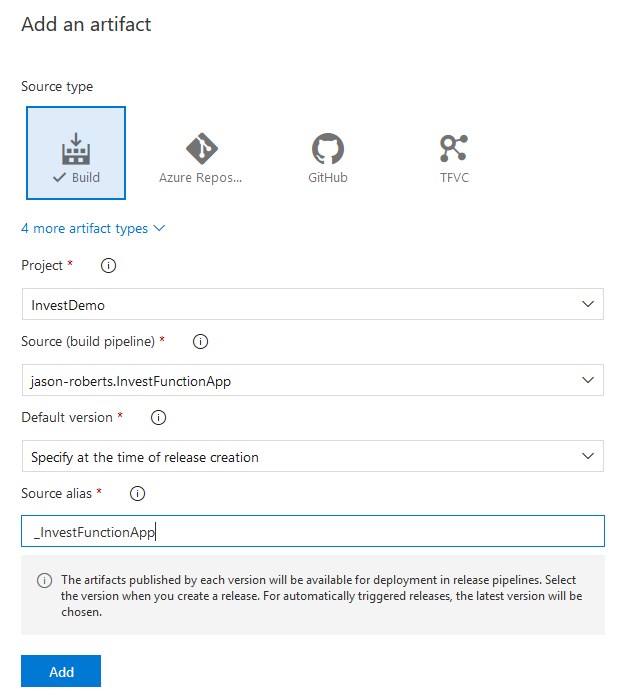
Next we need to add artifacts from the build pipeline to be used in the release. To do this click the Add link in the Artifacts section.
Leave the source type as Build (artifacts are being published from a build pipeline). As the source, select the build definition that we created earlier in this series. For the source alias enter “_InvestFunctionApp” and click Add:
Adding an Azure App Service Deploy Release Task
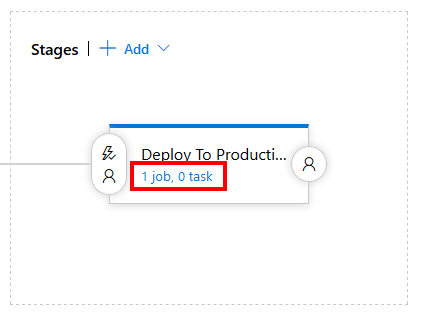
In the “Deploy to production” stage click the “1 job, 0 task” link:
Click the + button next to “Agent job” to show a list of prebuilt release tasks that can be added to the stage:
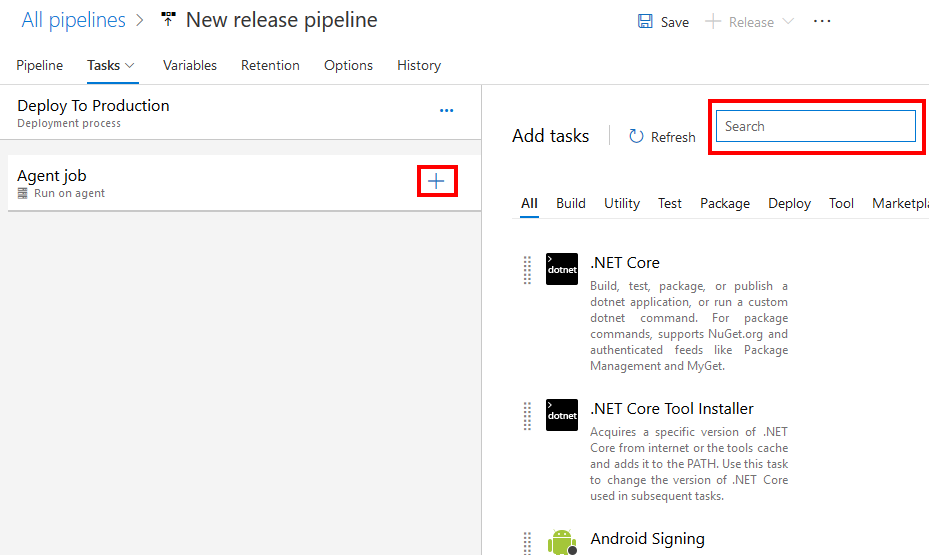
In the search box type “app service deploy” and click the Azure App Service Deploy task that shows up, then click the Add button to add the task to the stage:
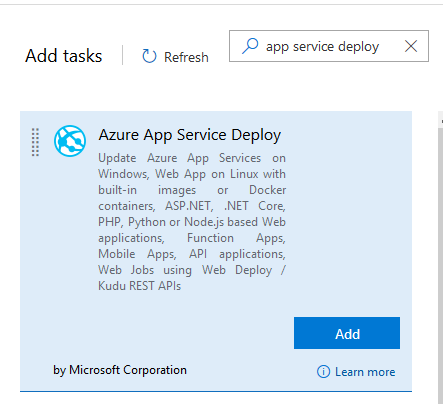
You will now have a new task in the stage that will state: “Some settings need attention”. Click on the newly added Azure App Service Deploy task to configure it.
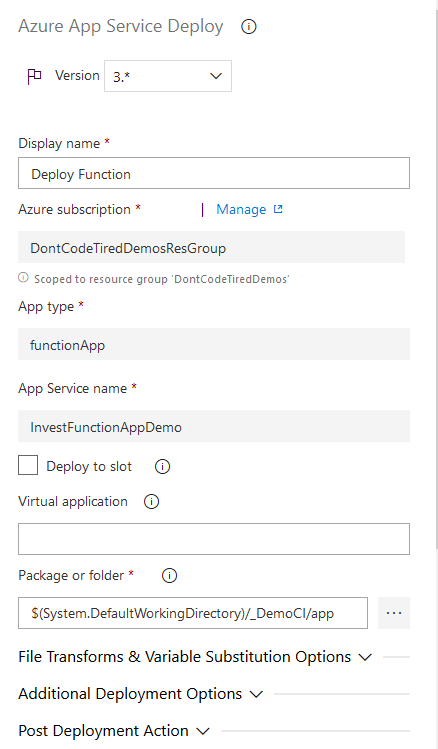
First you’ll need to specify the Azure subscription you want to deploy into - you will need to click the Authorize button and go through the authorization process.
Next change “App type” to “Function App”.
From the App Service name dropdown select the Function App you want to deploy into, in this series it’s the InvestFunctionAppDemo function created earlier in this series in the Azure Portal.
The next step is to choose what to deploy. To do this use the “…” next to Package or folder. This will allow you to choose the artifact that was created in the build pipeline. In this case we want to select the “app” artifact that contains the published Function App:
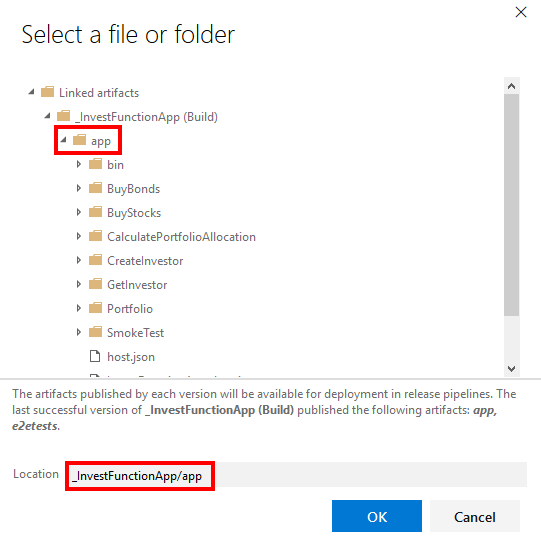
Select the “app” folder and click OK. You should see something similar to the following screenshot though your Azure Subscription details will be different:
Disabling Testing Azure Functions in Production
Later in this series we’ll be adding functional end-to-end tests that make use of a number of test functions. We do not want these test functions to be enabled in the deployed production Function App in Azure. (In the next part in the series we’ll discuss these testing functions more).
To disable functions in Azure Functions V2, a setting can be added in the format “AzureWebJobs.FUNCTION_NAME.Disabled” and set the value to “true”.
One way to do this as part of the release to production is to use the Azure CLI.
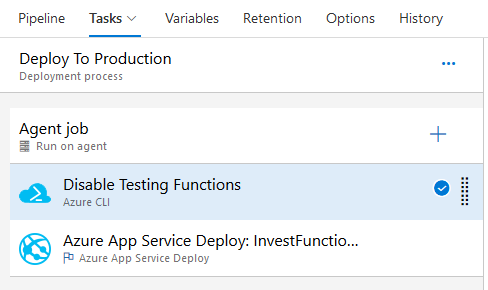
To execute Azure CLI commands, you can add a new task to the stage, the Azure CLI task. This task should come before the Azure App Service Deploy task. The task can be configured as follows:
- Display name: Disable Testing Functions
- Azure subscription: your Azure Subscription / resource group that contains the Function App you are deploying to
- Script location: Inline script (you could also supply a path to a source controlled script)
The contents of the inline script box are as follows:
call echo These could also be set in the Azure App Service Deploy task in the Application and Configuration Settings
call echo We are doing it this way so we ca have a separate task in the stage to make it more obvious
call az webapp config appsettings set -g DontCodeTiredDemos -n InvestFunctionAppDemo --settings AzureWebJobs.CreateInvestor.Disabled=true
call az webapp config appsettings set -g DontCodeTiredDemos -n InvestFunctionAppDemo --settings AzureWebJobs.GetInvestor.Disabled=true
This preceding script uses the az webapp config appsettings set command specifying the resource group “-g DontCodeTiredDemos”, the name of the Function App “-n InvestFunctionAppDemo” and the setting name and value “--settings AzureWebJobs.CreateInvestor.Disabled=true”.
Once configured, click the Save button and move the task above the deploy task as the following screenshot shows:
At this point you can also name the release pipeline by clicking “New Release Pipeline” at the top and choosing your own name, for example “InvestFunctionAppReleasePipeline”.
Enabling Continuous Deployment in an Azure Release Pipeline
If you want the release pipeline to automatically start when the build pipeline finishes, head back to the pipeline view and click the lightening bolt icon in the Artifacts area and enable the continuous deployment toggle switch as the following screenshot shows:
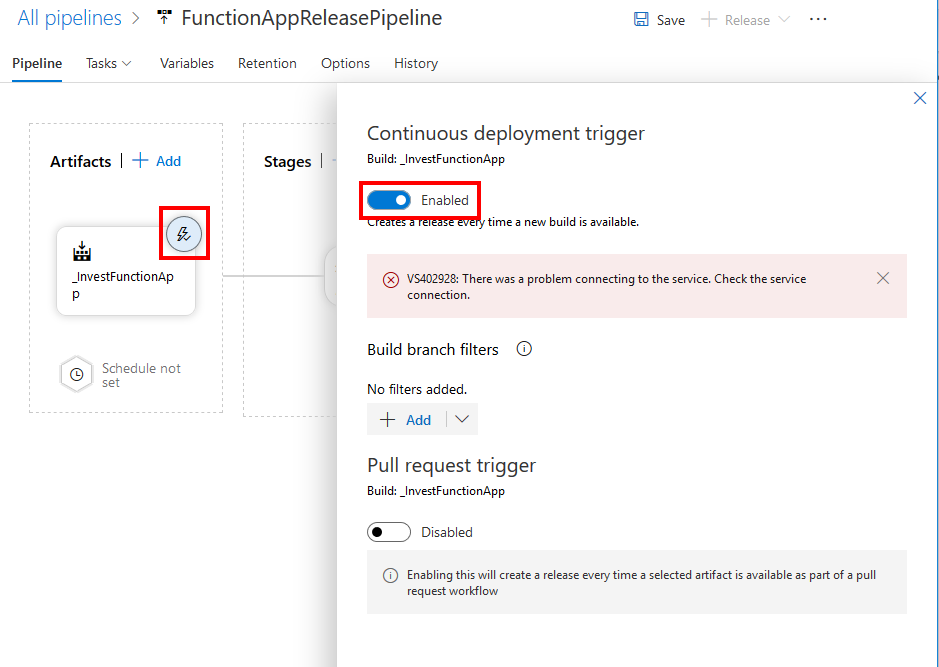
If you get a “Problem connecting to the service” error message it may not actually prevent the CD trigger but you may want to refer here.
Click the Save button.
Creating a Manual Release
Click the + Release button at the top right and click Create a release.
Choose the latest build from the build pipeline in the Artifacts section and click the Create button.
You will see a message saying “Release Release-1 has been created” with a handy link to click – click this and it will take you to the release being executed:
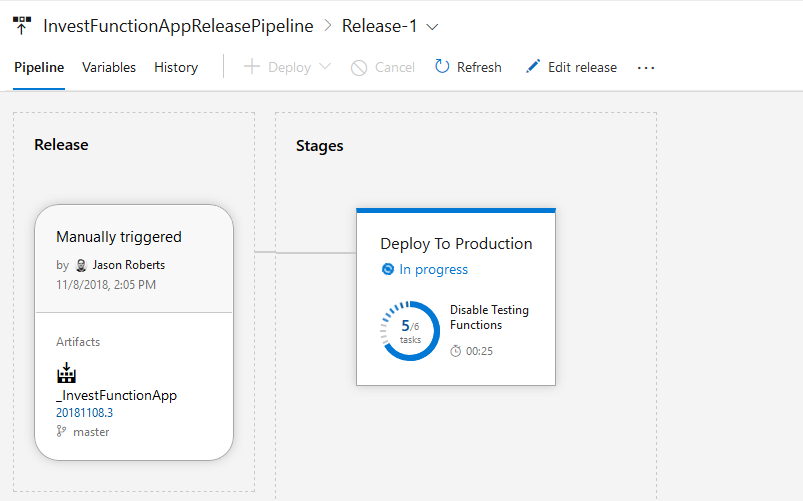
And once the release pipeline has executed you should see a “Succeeded” message in the Deploy to Production stage.
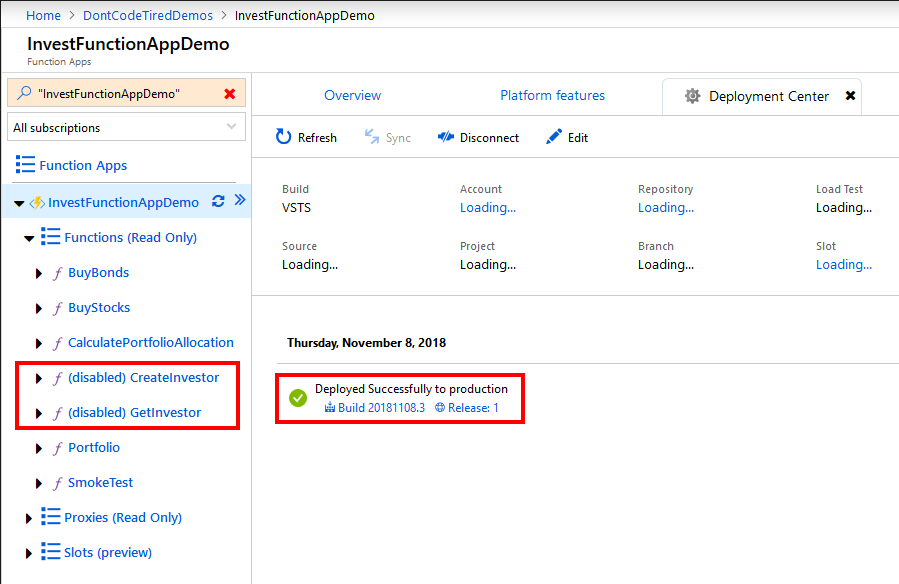
If you head over to the Function App in the Azure Portal you should see the functions deployed, along with the two testing functions being disabled and the deployment showing for Release 1 as the following screenshot shows:
Testing the CI Trigger
To test the CI trigger, make a change in the repository, commit the change, and then push to GitHub.
After a short while, the build pipeline should notice the change and kick off a new run of the build pipeline.
Once the build pipeline completes without error, the release pipeline should be automatically triggered and the changes (for Release 2) automatically deployed to the production Function App in Azure.
So now, we can add a feature or fix a bug, push the changes, and within a few minutes have the new feature or fix in production without us having to do anything else.
In the next instalment in this series we’ll add some functional end-to-end tests because at the moment ,all we have are unit tests in the build pipeline to verify correctness.
If you want to fill in the gaps in your C# knowledge be sure to check out my C# Tips and Traps training course from Pluralsight – get started with a free trial.


SHARE: