Basic printing can be accomplished through the PrintDocument class. For example, to print the entire contents of the LayoutRoot grid:
private void btnSimplePrint_Click(object sender, RoutedEventArgs e)

{

    string docName = "Test SL4 Print";


    PrintDocument doc = new PrintDocument();


    doc.PrintPage += (s, args) =>

    {

        // print the entire contents of our page (i.e. the

        // outer grid called LayoutRoot)

        args.PageVisual = LayoutRoot;

    };


    doc.Print(docName); // automatically shows a print dialog box

}
Various properties are avaible on the PrintPageEventArgs that are passed to the PrintPage event handle ('args' in the above example); args.HasMorePages allows you to control multi-page printing and args.PrintableArea allows you to get the printable page area you have available to you (which will depend on the settings chosen in the print dialog box that is shown automatically for you.
It is up to the developer to handle more complex scenarios such as overflowing contents, knowing if there are more pages required, etc. In an enterprise situation other PDF-scentric options may be a better choice, especially if there are complex report layouts required, etc. For example, using iText.NET, FOP, or an enterprise solution such as Thunderhead, xPression, etc.
SHARE:
C# 4.0 introduces the concepts of Optional Parameters and the related Named Parameters language features. Essentially by giving parameters a default value, callers can omit values for those parameters. The example code below produces the following output:
name: Peter age: 44 height: 200
NAME: PETER AGE: 44 YEARS HEIGHT: 200 CM
NAME: PETER AGE: 44 YEARS HEIGHT: 200 CM
NAME: PETER AGE: 44 YEARS HEIGHT: 200 CM
NAME: PETER AGE: 44 HEIGHT: 200
The code that produces this output:
class Program
{
static void Main(string[] args)
{
// Supply all parameters explicity (passing false)
Console.WriteLine(CreateString("Peter", 44, 200, false, false));
// Supply all parameters explicity (passing true)
Console.WriteLine(CreateString("Peter", 44, 200, true, true));
// Supply only minimum required parameters,
// the defaults (true) for useUpperCase & appendUnitText will be used
Console.WriteLine(CreateString("Peter", 44, 200));
// Supply the first optional parameter only
Console.WriteLine(CreateString("Peter", 44, 200, true));
// If we want to use the default for the first optional parameter (useUpperCase),
// but we want to supply a value for the second optional parameter we
// can use Named Parameters using the appendUnitText:false syntax
Console.WriteLine(CreateString("Peter", 44, 200, appendUnitText:false));
Console.Read(); // wait for enter key to be pressed
}
static string CreateString(string name,
int age, int height,
bool useUpperCase = true,
bool appendUnitText = true)
{
StringBuilder sb = new StringBuilder();
sb.AppendFormat("name: {0} ", name);
sb.AppendFormat("age: {0} ", age);
if (appendUnitText)
sb.Append("years ");
sb.AppendFormat("height: {0} ", height);
if (appendUnitText)
sb.Append("cm ");
if (useUpperCase)
return sb.ToString().ToUpper();
else
return sb.ToString();
}
}
If you want to fill in the gaps in your C# knowledge be sure to check out my C# Tips and Traps training course from Pluralsight – get started with a free trial.


SHARE:
Installing
Download and install VS 2010 RC (phone tools below don't currently work with RTM ver of VS 2010):
http://www.microsoft.com/downloads/details.aspx?FamilyID=301c97f3-aecf-42ca-966a-b8d7304f40b0&displaylang=en
Download and install vs 2010 express for windows phone ctp:
http://www.microsoft.com/express/Downloads/#2010-Visual-Phone
Developing
Open VS 2010 RC
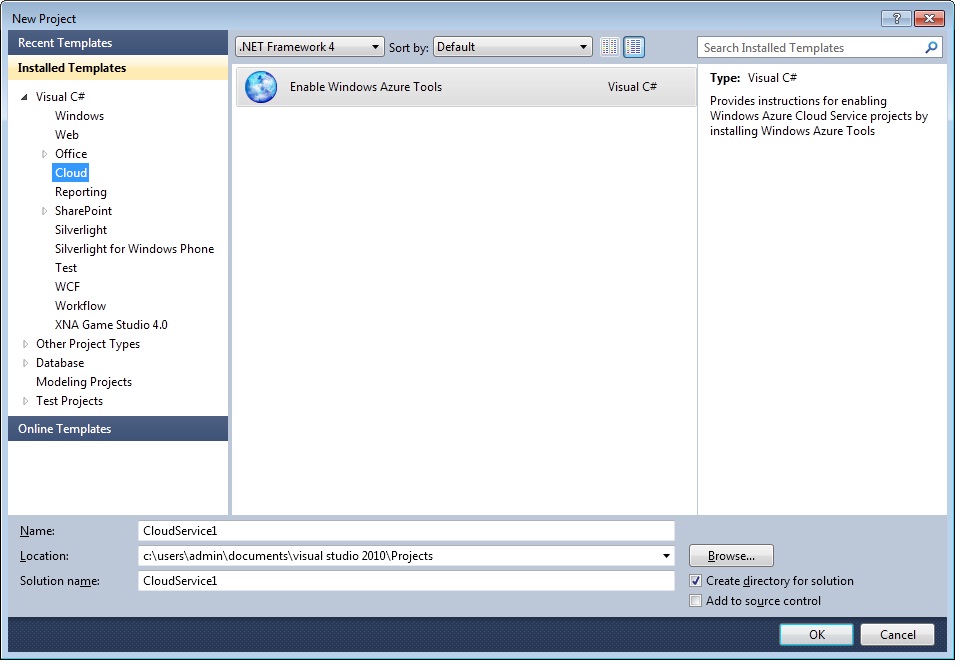
New --> Project
Double Click Enable Windows Azure Tools and follow instructions to install Azure tools ( once install starts you will have to quit VS2010)
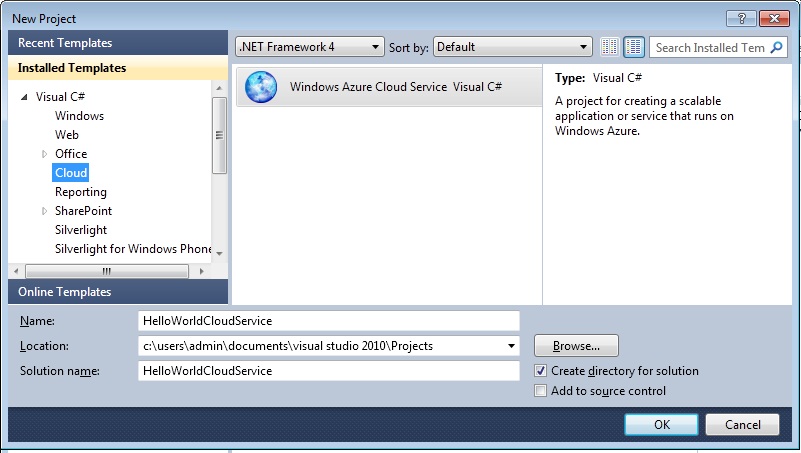
Reopen VS2010
Create new proj Cloud --> Windows Azure Cloud Service
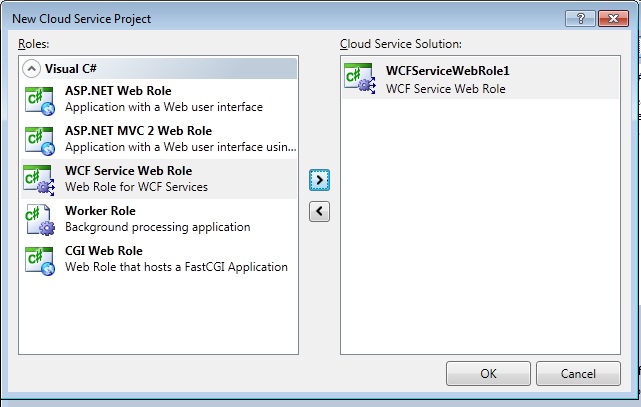
Add WCF Service Web Role
R click Service1 Refactor --> Rename to HelloWorldService
R Click definition for Iservice1 Refactor --> Rename to IHelloWorldService
Change interface and service class to:
using System;
using System.Collections.Generic;
using System.Linq;
using System.Runtime.Serialization;
using System.ServiceModel;
using System.ServiceModel.Web;
using System.Text;
namespace WCFServiceWebRole1
{
// NOTE: You can use the "Rename" command on the "Refactor" menu to change the interface name "IService1" in both code and config file together.
[ServiceContract]
public interface IHelloWorldService
{
[OperationContract]
string SayHello(string name);
}
}
using System;
using System.Collections.Generic;
using System.Linq;
using System.Runtime.Serialization;
using System.ServiceModel;
using System.ServiceModel.Web;
using System.Text;
namespace WCFServiceWebRole1
{
// NOTE: You can use the "Rename" command on the "Refactor" menu to change the class name "Service1" in code, svc and config file together.
public class HelloWorldService : IHelloWorldService
{
public string SayHello(string name)
{
return String.Format("Hello {0}.", name);
}
}
}
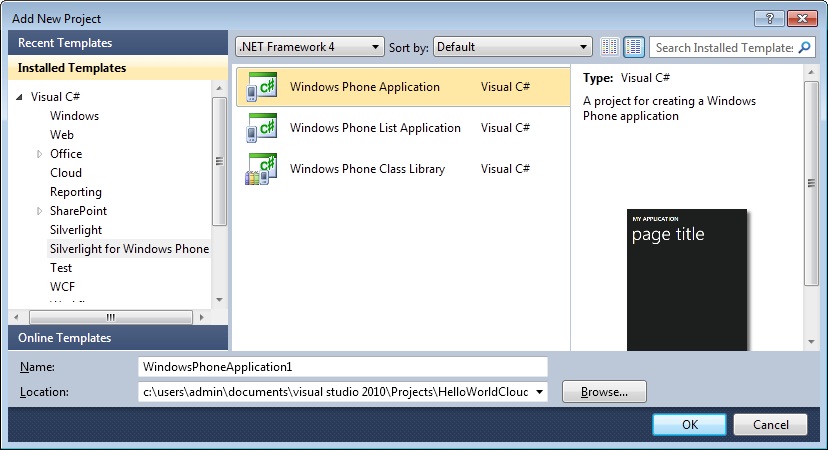
Add a Windows Phone Application project to the solution.
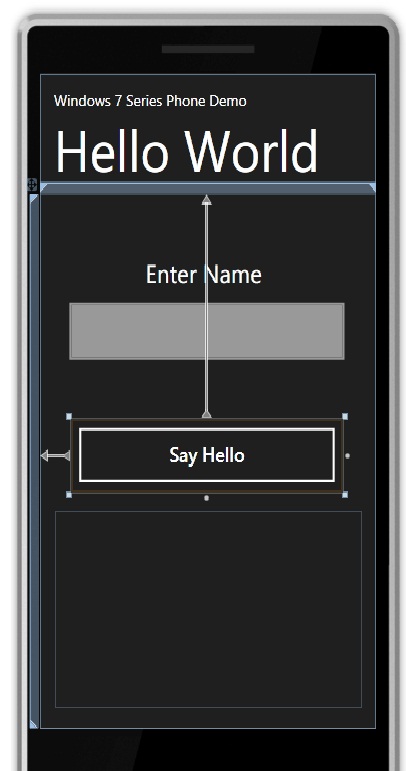
Create a user interface that looks similar to this (notice how the UI elements are pre-styled to the Win 7 phone look and feel codename 'Metro':
Here's where it gets a bit messy. VS2010 RC phone app project doesn't have an Add Service Reference, so: Save All, then r click Service1.svc --> Preview In Browser, then copy the URL - leave IE open
Open VS 2010 Express, open the solution (there might be some errors, but click ok to them), when the solution opens, add service reference to the Windows Mobile application and paste the URL into the add service box and click ok. Save all and close VS 2010 Express.
Go back to VS 2010 RC and click reload solution if you get prompted.
Now we can double click our button to go to the code behind and type:
private void button1_Click(object sender, RoutedEventArgs e)
{
ServiceReference1.HelloWorldServiceClient proxy = new ServiceReference1.HelloWorldServiceClient();
// declare callback as statement lambda
proxy.SayHelloCompleted += (s2, e2) =>
{
txtGreeting.Text = e2.Result;
};
// call 'Azure' service
proxy.SayHelloAsync(txtName.Text);
}
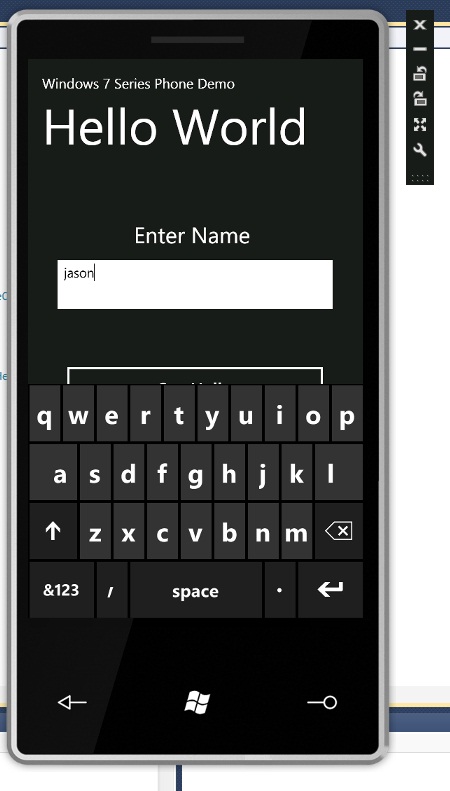
Now hit f5 and wait for the Windows Phone Emulator to start (it may take a little time...) then if u click on the button a keyboard will pop up:
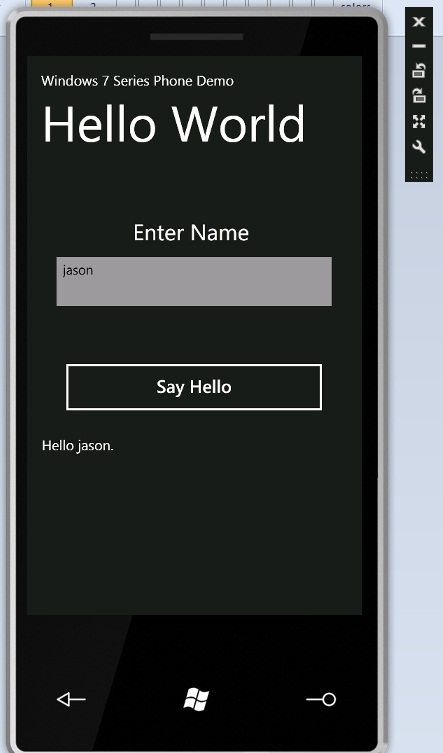
Type you name then click the Say Hello button, you should then see the "Hello ...." result displayed that was returned from the Azure service:
It's pretty amazing that a sole developer can now create a worldwide Win 7 phone app which connects to scalable set of services in Azure all from within VS2010.
SHARE: