Hosting HTML Content in Silverlight 4

In Silverlight 4 we can present HTML content to the user.

The WebBrowser Control

For example to display the content of DontCodeTired.com we can set the Source property in XAML:

<WebBrowser Name="webBrowser" Source="http://www.dontcodetired.com" />

Or we can use the Navigate method of WebBrowser:

webBrowser.Navigate(new Uri(@"http://www.dontcodetired.com"));

The user can navigate to links, right-click and open in new tab (which opens up tab in a full web browser), view source, etc.

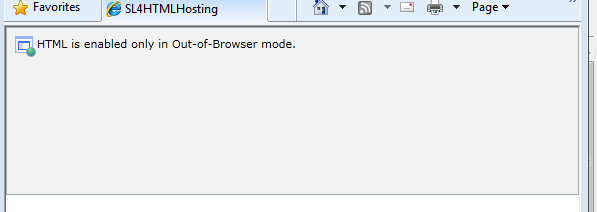
To use the WebBrowser the Silverlight app must be running out of browser (OOB), if you view when embedded in a web page (i.e. not OOB) the control displays a message saying that it can only be used in Out-of-Browser mode.

WebBrowser control running in-browser

WebBrowserBrush

Using the new WebBrowserBrush (previously HtmlBrush in beta 4) we can use the contents of a WebBrowser to fill another element.

For example, to fill an Ellipse with the content of a WebBrowser named "webBrowser" we define a WebBrowserBrush and sets its SourceName:

<Ellipse>
    <Ellipse.Fill>
        <WebBrowserBrush SourceName="webBrowser"  />
    </Ellipse.Fill>
</Ellipse>

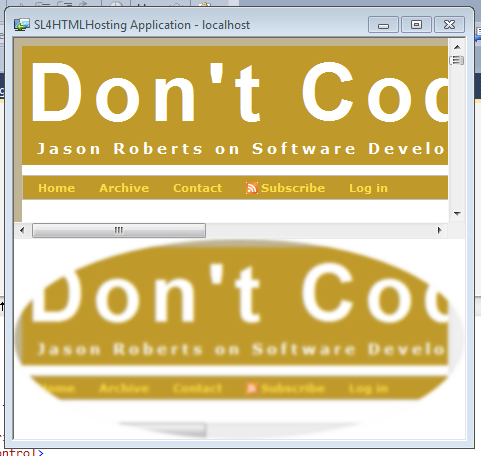
The following example creates an ellipse which is filled with a blurred version of the content of a WebBrowser. One thing to note is that we hook into the WebBrowser's LoadCompleted event to ensure the ellipse is updated whenever a page has been loaded into the WebBrowser. When run it looks like the image below: 


XAML:

<UserControl x:Class="SL4HTMLHosting.MainPage"
    xmlns="http://schemas.microsoft.com/winfx/2006/xaml/presentation"
    xmlns:x="http://schemas.microsoft.com/winfx/2006/xaml"
    xmlns:d="http://schemas.microsoft.com/expression/blend/2008"
    xmlns:mc="http://schemas.openxmlformats.org/markup-compatibility/2006"
    mc:Ignorable="d"
    d:DesignHeight="300" d:DesignWidth="400">

    <Grid x:Name="LayoutRoot" Background="White">
        <Grid.RowDefinitions>
            <RowDefinition Height="1*" />
            <RowDefinition Height="1*" />
        </Grid.RowDefinitions>
       
        <WebBrowser Name="webBrowser"
                    Source="http://www.dontcodetired.com"
                    Grid.Row="0"
                    LoadCompleted="webBrowser_LoadCompleted">
        </WebBrowser>
       
        <Ellipse HorizontalAlignment="Stretch"
                    VerticalAlignment="Stretch"
                    Grid.Row="1">
            <Ellipse.Effect>
                <BlurEffect Radius="5" />
            </Ellipse.Effect>
            <Ellipse.Fill>
                <WebBrowserBrush x:Name="browserBrush"
                                    SourceName="webBrowser"  />
            </Ellipse.Fill>
        </Ellipse>
          
    </Grid>
</UserControl>

Code Behind:

using System.Windows.Controls;

namespace SL4HTMLHosting
{
    public partial class MainPage : UserControl
    {
        public MainPage()
        {
            InitializeComponent();
        }

        private void webBrowser_LoadCompleted(object sender, System.Windows.Navigation.NavigationEventArgs e)
        {
            browserBrush.Redraw();
        }
    }
}

Interacting With WebBrowser Content

The following example uses WebBrowser.NavigateToString which allows a string of HTML to be rendered rather than a page at some Uri. The example creates a simple html button which uses window.external.notify to pass a message to the WebBroswer control via it's ScriptNotify event.

XAML:

<Grid x:Name="LayoutRoot" Background="White">            
    <WebBrowser Name="webBrowser"
                ScriptNotify="webBrowser_ScriptNotify">                  
    </WebBrowser>          
</Grid>

Code Behind:

using System.Windows.Controls;
using System.Text;
using System.Windows;

namespace SL4HTMLHosting
{
    public partial class MainPage : UserControl
    {
        public MainPage()
        {
            InitializeComponent();
           
            // Create some basic HTML on the fly containing a simple button,
            // that when clicked passes a message to the containing WebBrowser
            var html = new StringBuilder();
            html.Append("<html>");
            html.Append("   <body>");
            html.Append(@"       <input type=""button"" value=""Show Message Box"" onclick=""window.external.notify('button click');"" /> ");
            html.Append("   </body>");
            html.Append("</html>");

            webBrowser.NavigateToString(html.ToString());
        }


        private void webBrowser_ScriptNotify(object sender, NotifyEventArgs e)
        {
            MessageBox.Show(string.Format("Message from web page: '{0}'.",e.Value));
        }
    }
}
 

SHARE:

Introduction To jTemplates - A jQuery and JavaScript Template Engine

jTemplates is a great lightweight template engine for jQuery and JavaScript. It allows you to process data (e.g. JSON data returned from an AJAX call) and feed it ito a template definition rather than manually building your html elements.

jTemplates supports foreach, for, if..elseif..else constructs in additional to parameters, nested templates etc.

The example below defines a template to display a list of orders and for each order the list of items that belong to that order. It shows how nested foreach can be used. The project documentation goes into more detail.

<!DOCTYPE html PUBLIC "-//W3C//DTD XHTML 1.0 Transitional//EN" "http://www.w3.org/TR/xhtml1/DTD/xhtml1-transitional.dtd">
<html xmlns="http://www.w3.org/1999/xhtml" >
<head>
    <script src="js/jquery-1.3.2.min.js" type="text/javascript"></script>
    <script src="js/jquery-jtemplates0.7.8.js" type="text/javascript"></script>
   
    <title>jTemplates Demo</title>
   
    <script type="text/javascript" language="javascript">
        // define some sample data orders
        var sampleOrder1 = {
            orderID: 'OR0001',
            orderItems: [
                { product: 'Apple', quantity: 23 },
                { product: 'Kiwi', quantity: 13 },
                { product: 'Orange', quantity: 2 },
                { product: 'Mango', quantity: 99 }
            ]
        }
        var sampleOrder2 = {
            orderID: 'OR0002',

            orderItems: [
                { product: 'Pear', quantity: 2 },
                { product: 'Mango', quantity: 400 }
            ]
        }

        // define a list of (2) sample orders
        var sampleOrdersList = {
            orders : [sampleOrder1, sampleOrder2]       
        }

        // When the DOM is ready apply the jTemplate
        $(document).ready(function() {
            // Tell jTemplates we want the div with the ID of renderedContentWillGoHere
            // to be filled with the templated
            $('#renderedContentWillGoHere').setTemplate($('#ordersListTemplateDefinition').html());

            // Combine the data in sampleOrdersList with the templateand render
            $('#renderedContentWillGoHere').processTemplate(sampleOrdersList.orders);
        });
   
    </script>


    <script type="text/html" id="ordersListTemplateDefinition">
   
        <!-- iterate over all the orders that were passed in as data
             and as each order is processed we give it an alias of currentOrder -->
        {#foreach $T as currentOrder}
   
            <!-- Output the orderID for the currentOrder we are iterating -->
            <h1> Order ID: {$T.currentOrder.orderID} </h1>
           
           
            <!-- Now we have a nested loop where we output the orderItems for the currentOrder -->
            <h4>Order Items</h4>           
            <ul>
                {#foreach $T.currentOrder.orderItems as currentOrderItem}
                    <li>{$T.currentOrderItem.product} {$T.currentOrderItem.quantity}</li>
                {#/for}
            </ul>           
           
        {#/for}
       
    </script>
       
</head>

<body>
    <div id="renderedContentWillGoHere"></div>
</body>

</html>

SHARE:

JavaScript Enumerations

Rather than defining many JavaScript 'constants', e.g.


var CONST_DAY_OF_WEEK_MONDAY = 1;

var CONST_DAY_OF_WEEK_MONDAY = 2;

var CONST_DAY_OF_WEEK_MONDAY = 3;

etc.

You can alternatively declare:

var daysOfWeek= { monday: {}, tuesday: {}, wednesday: {} }; // etc.

And then you can use instead of integer constants, for example a function to alert if a day is Monday:

function alertMondays(today){

 if (today == daysOfWeek.monday)

   alert('Bad case of the Mondays');

}

SHARE:

Asp.net AJAX service proxy intellisense in external js

If you have service reference (e.g. to an AJAX Enabled WCF Service) in your ScriptManager (or ToolkitScriptManager):

<asp:ToolkitScriptManager ID="ToolkitScriptManager1" runat="server">
    <Services>
        <asp:ServiceReference Path="~/MotoService.svc" />
    </Services>
</asp:ToolkitScriptManager>

and your are using an external JavaScript file you can enable JavaScript intellisense by adding the following 2 lines to the top of your .js (replacing ~/MotoService.svc with the path to your own service):

/// <reference name="MicrosoftAjax.js" />
/// <reference path="~/MotoService.svc" />


SHARE:

Maintaining Basic State With jQuery And CSS

When working on the client, you may have a number of HTML elements that have some form of logical state, e.g. coins (heads/tails), cards (face up/down), importance (high, medium, low), etc.

You could declare a variable for each element (or an array); when the use changes the state you update the variable representing the elements state and perform any UI changes.

An alternative to this which removes the need for additional variables is to represent the state of the element by which CSS classes are currently added to it.

The example below (view live example) shows one way to achieve this using jQuery. It represents a number of simulated coins and if each coin's state is heads or tails.

<!DOCTYPE html PUBLIC "-//W3C//DTD XHTML 1.0 Transitional//EN" "http://www.w3.org/TR/xhtml1/DTD/xhtml1-transitional.dtd">
<html xmlns="http://www.w3.org/1999/xhtml">
<head>
    <title>Maintaining basic state with jQuery and CSS</title>

    <script type="text/javascript" src="jquery-1.3.2.js"></script>

    <script type="text/javascript">
        $(document).ready(function() {
            $("#btnClick").click(function() {
                /* Select every element that has the CSS class coin applied
                   and iterate using the each function */
                $(".coin").each(function() {
                    /* Check the each element to see if it has a tails or heads
                       css class, and 'flip' the class and the text from T->H */
                    if ($(this).hasClass("heads"))
                        $(this).removeClass("heads").addClass("tails").text("T");
                    else if ($(this).hasClass("tails"))
                        $(this).removeClass("tails").addClass("heads").text("H");
                });
            });
        });
    </script>

    <style type="text/css">
        .coin
        {
            background-color: Silver;
            font-size: 24pt;
            font-weight: bold;
            padding: 5px;
        }
        /* We don't have to define .heads and .tails to make use of
        the state maintenance, but they are defined here for visual cues */
        .heads
        {
            color: Black;
        }
        .tails
        {
            color: White;
        }
    </style>
</head>
<body>
    <h1>Maintaining basic state with jQuery and CSS</h1>
    <span class="coin heads">H</span>
    <span class="coin heads">H</span>
    <span class="coin tails">T</span>
    <span class="coin heads">H</span>
    <span class="coin tails">T</span>
    <h4>H = heads, T = Tails</h4>
    
    <form action="#">
    <input type="button" id="btnClick" value="Flip Coins" />
    </form>
    <h4>from: <a href="http://www.dontcodetired.com" title="Don't Code Tired" >Don't Code Tired</a></h4>
</body>
</html>

SHARE:

Basic Element Visibility in jQuery

Out of the box, jQuery comes with basic methods to show and hide elements. There is a live example here of the functions listed in this post.

slideToggle slide the element up/down to hide.show. It handles the toggle state automatically so you don't need to define a separate state boolean.

$("#content").slideToggle("slow");

toggle fades and shrinks the element to the upper left, again toggle state is handled automatically.

$("#content").toggle("slow");

fadeIn and fadeOut perform a fade and collapse/expand the element.

$("#content").fadeIn("slow");
$("#content").fadeOut("slow");


In the above examples the parameter "slow" can also be set to "normal", "fast" or a number in milliseconds.

SHARE:

A Simple Menu Roll-over using jQuery and CSS

The following ASP.NET page shows a simple example of a menu created using a combination of CSS and jQuery.

The menu is defined as an unordered list (which makes semantic sense) and styled with CSS (a real web site would of course have its CSS defined in external file(s)). When the user moves the mouse over a menu item, a CSS class is dynamically added; then removed when the mouse leaves. In addition a simple "infobox" span is defined whose text is changed to that of the title attribute of the <a> element.

There are lots of examples of image based roll-overs, this one is really cool and based on a simple idea.


<%@ Page Language="C#" AutoEventWireup="true" CodeFile="Default.aspx.cs" Inherits="_Default" %>

<!DOCTYPE html PUBLIC "-//W3C//DTD XHTML 1.0 Transitional//EN" "http://www.w3.org/TR/xhtml1/DTD/xhtml1-transitional.dtd">
<html xmlns="http://www.w3.org/1999/xhtml">
<head runat="server">

    <script type="text/javascript" src="jquery-1.3.2.js"></script>

    <title>Simple jQuery Menu Example</title>

    <script type="text/javascript">

        var menuPrompt = "Please select a page to view."; // simple prompt for user
       
        $(document).ready(function() {

            // initialise the infobox prompt
            $("#infobox").text(menuPrompt);
       
            $(".nav_menu_list li a")
            .mouseover(function() {
                // add the mouseover style
                $(this).addClass("nav_menu_item_mouseover");
                // set the text of the infobox span to the anchor title attribute
                $("#infobox").text("Go to " + $(this).attr("title"));
            })
            .mouseout(function() {
                //remove the mouseover style
            $(this).removeClass("nav_menu_item_mouseover");
                // reset the text of the infobox span to user prompt
                $("#infobox").text(menuPrompt);
            })
        })
   
    </script>

    <style type="text/css">
        .nav_menu_list
        {
            list-style-type: none;
            margin: 0 0 0 21px;
            padding: 0;
        }
        .nav_menu_list li
        {
            float: left;
            text-align: left;
        }
        .nav_menu_list li a
        {
            display: block;
            padding: 0 10px 0 5px;
            text-decoration: none;
            font-size: 36pt;
        }
        .nav_menu_item_notmouseover
        {
            color: #0000FF;
            background-color: White;
        }
        .nav_menu_item_mouseover
        {
            color: White;
            background-color: #ec1c24;
        }
    </style>
</head>
<body>
    <form id="form1" runat="server">
    <div>
        <ul class="nav_menu_list">
            <li><a title="Page 1" href="#" class="nav_menu_item_notmouseover">Page 1</a> </li>
            <li><a title="Page 2" href="#" class="nav_menu_item_notmouseover">Page 2</a> </li>
            <li><a title="Page 3" href="#" class="nav_menu_item_notmouseover">Page 3</a> </li>
        </ul>
        <div style="clear: both;">
            <span id="infobox"></span>
        </div>
    </div>
    </form>
</body>
</html> 

SHARE:

Changing background image on <body> element with jQuery when using ASP.NET master pages

If you have an ASP.NET master page defined as below which specifies a css class for the body element to generate a background image for the whole page, you might want to override the default background on specific pages.

One way to accomplish this is to use jQuery to replace the css class that is being applied to the <body> element.

The master page below declares 2 ContentPlaceHolder controls; the first (ID="head") exisist within the <head> element, the second (ID="MainContentPlaceHolder") exists within the main body of the page.


<%@ Master Language="C#" AutoEventWireup="true" CodeFile="MasterPage.master.cs" Inherits="MasterPage" %>
<!DOCTYPE html PUBLIC "-//W3C//DTD XHTML 1.0 Transitional//EN" "http://www.w3.org/TR/xhtml1/DTD/xhtml1-transitional.dtd">

<html xmlns="http://www.w3.org/1999/xhtml">

<head runat="server">
   
    <script type="text/javascript" src="jquery-1.3.2.js" ></script>
   
    <asp:ContentPlaceHolder ID="head" runat="server">
    </asp:ContentPlaceHolder>
   
</head>

<body class="defaultbodybackground">
    <form id="form1" runat="server">  
        <asp:ContentPlaceHolder ID="MainContentPlaceHolder" runat="server" />
    </form>
</body>

</html>


In one of our child pages we could add the following:


<asp:Content ID="Content1" ContentPlaceHolderID="head" runat="Server">
 
    <script type="text/javascript">

           $(document).ready(function() {
               $("body").removeClass("defaultbodybackground");
               $("body").addClass("newbodybackground");
           })
        
        </script>
</asp:Content>


When the page is loaded, the above jQuery JavaScript runs and replaces the class "defaultbodybackground" with the page specific "newbodybackground".

A cool thing about jQuery is that you can have multiple $(document).ready() defined - for example you could also have some jQuery defined in the master page.

SHARE: